Jump Ring Jewelry
Got jump rings and a clasp? You've got a delightful necklace or bracelet just waiting to be made. Learn linking techniques to turn the humble jump ring into the star of the show.

Instructions
Step 1
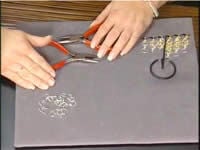
Open each jump ring in one package. You will always want to open each individual jump ring in the package as you need them. Open using pliers on each side of the split in the ring, rotating each side away from the other.
Step 2
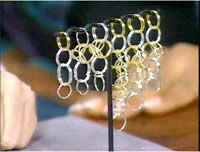
Make a 2x2x2 chain.
Step 3
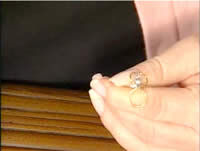
Add a single jump ring to a set of two jump rings on one end; this will be the end you attach to your clasp later, and will be considered the 'bottom' of the chain. Flip the top set of jump rings down, one to each side.
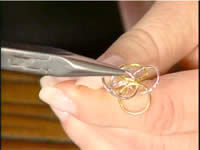
Step 4
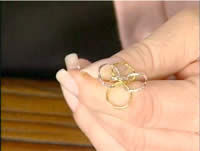
Separate the second set of jump rings, making sure the top set stays separated. This should create a ''flower'' type formation, exposing the bottom curve of the top set of jump rings (the ones you flipped in Step 3).
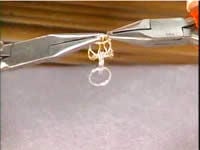
Step 5
Pick up an open jump ring from Step 1 and ''scoop'' up the bottom curved part of the top set of jump rings. Close the jump ring. Add a second jump ring next to the first and close.
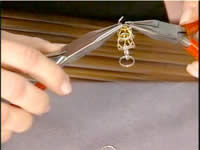
Step 6
Attach 2 more jump rings to the new set of jump rings and repeat Steps 4 and 5.
Step 7
Repeat Step 4 and 5 until the design is the desired length.
Step 8
Attach a clasp at the bottom end.
Shop for Your Materials Here:


Have a question regarding this project? Email Customer Service.
Copyright Permissions
All works of authorship (articles, videos, tutorials and other creative works) are from the Fire Mountain Gems and Beads® Collection, and permission to copy is granted for non-commercial educational purposes only. All other reproduction requires written permission. For more information, please email copyrightpermission@firemtn.com.